The Action
The foggy dawn may initially have made it difficult for the two forces to see their enemy’s deployment, but it was not a significant factor. It was the Galwegians who launched the first Scottish attack in what appears to have been a somewhat ill disciplined charge.
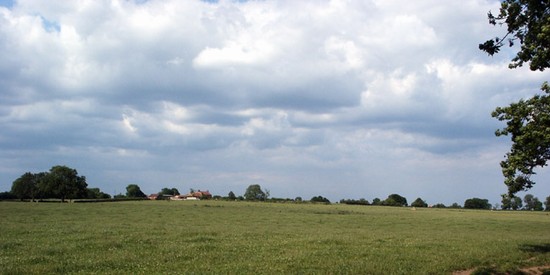
Some authors suggest that they had a significant disadvantage because the English held a hill, forcing the Scots to attack up it. However even on the traditional site this cannot be reconciled with the actual battlefield terrain. In reality, especially where the new evidence suggests the English were deployed, it is a wide almost flat area, which matches the description of a broad field in the contemporary accounts. In reality it was the storm of English arrows which blunted the Galwegian attack, because these Scottish troops were unarmoured. Indeed so effective was the fire of the English archers that these Scottish infantry are described in the accounts as looking like hedgehogs as they retreated. However some Galwegians did reach the English lines, and at least one section, possibly on the left, the front of the English battle array, was temporarily broken. But the English that wavered were seconded by other troops and the Galwegian attack was repulsed. After withdrawing the Galwegians made a second attack but this met the same fate. Even their commander himself was killed by an arrow and his men fell back in disorder. The second Scottish line now attacked but they too failed to break the English.
In what may have been one and a somewhat desperate attack, Prince Henry launched a cavalry charge from the Scottish right, possibly with as few as 60 mounted knights. The heavily armoured cavalry with their lances broke through the English lines, but the men at arms again advanced to close the breach and so the Scottish infantry that seconded the cavalry attack were repulsed.
The Scottish cavalry, presumably disorganised and with their horses blown, were unable to capitalise on their success, other than perhaps pillaging any baggage that had been brought with the army, and played no further significant part in the action. Burne has the English horse guard providing a strong resistance and the third English line turning about to attack the Scottish cavalry, in order to explain the position of the Scot Pits behind the traditional position of the English battalia, but there is no documentary support for this and the need for such an explanation is removed by the repositioning of the English lines. The Scottish cavalry would later return as best they could, some removing their insignia so as to be able to mingle with the English troops and thus escape, as many cavalrymen would do in various subsequent battles down the centuries. Prince Henry did not finally rejoin his father until three days later.
The Galwegian forces already in flight, and with their leaders Donald and Ulerich dead the rest of the Scottish infantry began to follow suit, retreat turning into rout. David’s rearguard could do no more than provide a rallying point for the routed infantry and to protect their retreat from the field and to limit the execution by the advancing English. After perhaps as little as two hours the battle was over. It is said that the battle was sometimes known as the Battle of Baggamoor on account of the discreditable Scottish retreat.