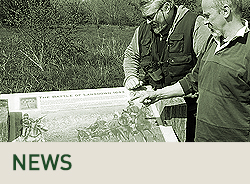
The Battle
According to Barbour, who wrote of the exploits of Robert Bruce 50 years after the battle, the Scots made a forced night march in order to surprise Edward, who appears to have moved his headquarters from Rievaulx Abbey to Byland Abbey and had placed an advance guard of his best men at the top of Sutton Bank led by Sir Thomas Ughtred, and Sir Ralph Cobham.
Faced with this formidable obstacle, King Robert held a council of war with his trusted captains, Sir James Douglas, ‘the Black Douglas’, and Thomas Randolph, Earl of Moray. The only way to circumvent the narrow pass was an 18-mile detour to the south and east by way of Helmsley, which would mean any chance of capturing Edward and his entourage would be lost, so it was quickly decided that an attempt must be made to carry the position by assault.
Douglas and his division led the attack and was joined by Moray. The English defenders put up a spirited and stout resistance. According to Barbour “There you could see men attacking very strongly, others defending themselves by fighting stoutly and arrows flying in great numbers, while those who were above tumbled stones down on the Scots from the high ground.”.
Neither side could bring great numbers to bear in the narrow confines of the steep pass, and bitter hand to hand combat ensued as the Scots gradually forced their way uphill in the face of determined opposition.
It was at this point that King Robert seeing that the English were hard-pressed and pre-occupied with repelling the Scottish frontal assault, detached a strong body of troops to circle round and ascend the precipitous slopes at a point hidden from the defenders by the protruding cliffs. The men chosen for this task were mainly from the Highlands of Scotland, and being well used to operating in such terrain they soon gained the ridge which was now more lightly defended as men had been drawn off to help repulse the main attack. The Highlanders quickly overwhelmed their opponents and began to form up in numbers on the English left flank.
According to Barbour, the Scots attacking up Sutton Bank had just managed to force their way to the top at the same time as their compatriots appeared on the defenders’ left flank. Suddenly what was a difficult position for the English had become an impossible one.
The resolve of those defending the pass was already wavering as the attackers forced their way up and out on to the level ground, with Cobham compelled to withdraw, and Ughtred fighting on until captured. But with the Scots bearing down on their flank in force, the English broke and fled in disorder towards their main force in the vicinity of Byland. It was probably at this point that Edward withdrew from Byland Abbey to the relative safety of Rievaulx. (Lanercost Chronicle)
The men of Douglas’ division combined with the Highlanders to quickly secure the top of Sutton Bank, with the rest of the army coming up the pass to deploy in battle formation on top of the escarpment. Bruce ordered his men on to the attack to prevent the English regrouping and restoring order to their ranks.
The main English force consisting mainly of newly levied men under the Earl of Richmond was probably located at Old Byland and Cold Kirby. Despite the inexperience of these men, Richmond decided make a stand there with the army. But he was soon overcome and captured and what was left of the army fled. (Barbour and Scalaronica)
Many of the English were taken prisoner including the English commander the Earl of Richmond, who was held ransom for a vast amount (variously reported as 14,000 marks, 3,000 pounds, and as much as 20,000 pounds). In marked contrast was the Bruce’s treatment of some high-ranking French knights who had been on an embassy to Edward and felt honour-bound to fight for their host. The French prisoners were treated as honoured guests, and after some time enjoying the king’s hospitality, were sent home laden with gifts and without ransom. Bruce was probably partly motivated by the hope of gaining favour from the king of France by treating the French prisoners in this way, as well as his sense of chivalry.
After their complete victory at Byland, no serious resistance to the Scots remained north of the Humber. The army appears to have divided after battle in order to maximise the scope for plunder. The East Riding was occupied as far as Beverley with Bruce pillaging the area of the Howardian Hills up to the gates of York, while a further band, probably commanded by the Black Douglas, struck west through Airedale as far as Skipton. Thereafter they made their way north again, re-grouping on the way, before crossing the border, rich with the spoils of victory, on the 2nd of November. (Lanercost Chronicle)
Despite the comprehensiveness of his defeat, Edward did not immediately sue for peace, nor was he inclined to recognise Scottish independence or the legitimacy of Bruce’s kingship. However, in 1323 Edward had Andrew Harclay, Governor of Carlisle, executed for entering into negotiations with King Robert to agree a unilateral truce. He had also been, probably unfairly, accused of failing to come to Byland when ordered. The loss of Edward’s ablest captain, and the North’s main buffer against the depredations of the Scots, together with a deterioration in relations with France, forced Edward to the negotiation table. On the 13th May 1323 in York the King’s council proposed a truce for thirteen years, which was accepted by the Bruce at Berwick on the 7th June under his title of King of Scots. Edward’s de facto acceptance of King Robert’s title, together with the other agreed concessions, was a vindication of everything Bruce had been fighting for since he seized the Scottish crown 17 years previously. Never again would Edward II take up arms against the Scots.