Scarp Edge Walk
5km (3 ml): an easy walk over fairly level ground on a well marked path with well maintained gates and stiles, providing stunning views across the whole battlefield. In order to avoid the steep descents and ascents involved in the longer circular walk, on this route it is necessary to retrace ones steps from the two extremities of Lansdown Hill.
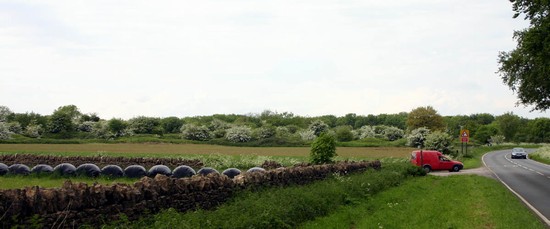
From the interpretation panels by the parking area walk across the road and follow the clearly waymarked Cotswold Way westward. Note that up here on the plateau the fields are bounded by stone walls rather than hedges, because limestone forms the plateau here and on Freezing Hill whereas the lower ground is largely on clay. Stone walls figured significantly in the action, but it is not yet clear which existed at the time of the battle and which are more recent in origin. Where the path follows the service road to the Fire Brigade Training Centre, before entering the gate next to Beach Wood, look to the left. There is a field of hills and hollows that is being rapidly encroached by small trees and scrub. These are the quarry pits into which the royalist musketeers threw themselves for cover on the evening of the battle, once the parliamentarians had retreated from their defensive work close to the scarp edge. We do not know whether there has been any further quarrying here since the battle or if, apart from the encroaching scrub, it is today very much as it was in 1643. This area is identified as Open Country in the new Access mapping and, although not at present (2004) publicly accessible, hopefully it will become so in the near future.
Follow alongside Beach Wood where parliamentarian musketeers were deployed to harry the royalist advance up the hill, but through which the royalist musketeers finally drove back Waller’s men. Continue down the lane past the Fire Station and out onto the open pasture field, which is also identified for future open access. Follow along the scarp edge, noting the uneven ground on the hilltop and towards the further end of the field running down the slope. These are yet more quarries, not as some say the gun emplacements for Waller’s artillery. Near the quarry pits there is also what appears to be a hollow way, a now abandoned lane, leading off obliquely down the slope to the west. This may have been one of the routes which the royalists took to ascend the hill and outflank Waller's forces.
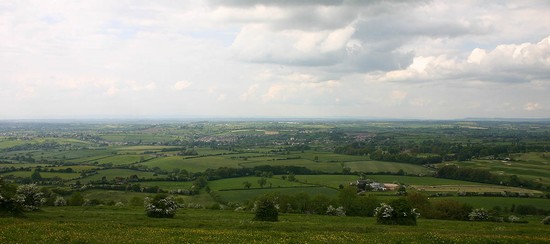
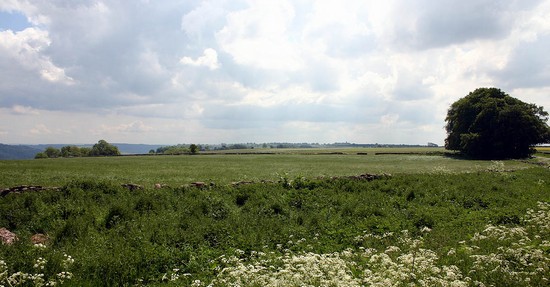
At the western end of the field, known as Hanging Hill from the steepness of its slopes, is an interpretation panel and marker. Across the wall to the south east the plateau is almost perfectly flat, in contrast to the steepness of the slope to the north where it plunges down into the valley. From this scarp edge there are dramatic if somewhat distant views across the northern part of the battlefield in the valley and on Freezing Hill. It is clear how much higher Lansdown Hill is and thus how much more knowledge Waller would have had of the royalists troop deployments than they would have had of his.Now retrace your steps along the trail to the starting point.
Having crossed the main road, walk to the Grenvile monument, clearly visible 100m to the north east, walking along the earlier route of the main road, which used to follow close to the wall. It is in this central area of the battlefield, just a short distance from the edge of the scarp, that the Waller must have constructed the defences, between Beach Wood on the west and possibly another area of woodland to the east. The Grenvile monument, located on the very brow of the hill probably does represent the location where the Cornish commander fell as his troops finally managed to secure their hold on the scarp edge against intense fire and cavalry charges.
Follow the Cotswold Way down slope and to the right over a stile, then skirting eastward just below the brow of the hill. Brief glimpses can be gained, looking north, across the landscaped grounds of Battlefields house, to Freezing Hill and beyond it the summit of Tog Hill. The path turns south back on to the hilltop, giving an excellent view of the ground across which Waller’s men retreated to their second defensive position, possibly the wall which still crosses the plateau from east to west, a couple of hundred metres away.
Just over the stone stile, where the ground falls steeply south eastward from the plateau, there is a new interpretation panel and monument. Continue eastward along the Cotswold Way into a small lane leading gradually down the hill towards Lower Hamswell. This winding Lane may have been one of the routes which royalist forces took in their flanking attack. Follow the Cotswold Way as it leaves the lane, north eastward. From here there is an excellent panorama, from the upper slopes of Freezing Hill right around to Tog Hill running on as a ridge eastward towards Marshfield. If you continue down to the next gate there are even clearer views across this area where the early phases of the battle were fought. Also looking back up slope the steepness of the front scarp of Lansdown Hill becomes very apparent.
Now retrace your steps to the interpretation panel beside the stone stile, but do not cross the stile. Instead continue on beside the wall and through the gate, then bearing right to cross the field diagonally to the opposite corner. It has been suggested that the northern wall of this field is the one behind which Waller’s troops took cover after their initial retreat. However as you approach the other corner of the field, if the grass is cropped low, it is just be possible to see the slight earthwork traces of an enclosure which spans the main road. It is slightly clearer in the field on the other side of the road. Was this a prehistoric enclosure or a was it a walled sheepcote still standing in 1643 within which some of the parliamentarians took cover?
Cross the road using the wide verge to walk north back to the starting point, noting the proximity of the quarry pits (which you passed at the beginning of the walk) to Waller’s possible position at the stone wall.