Methodology
Field Survey method
Transects are laid out a 10m intervals aligned parallel to the most convenient hedge. Two parallel baselines are laid out using ranging poles with a 'cross-sight' ranging poles, to give accurate right angles. A reel of heavy duty cord marked at 10m intervals is run out along each baseline. Canes, 1m long, are placed at each 10m mark, the flags on the canes alternating between transects in the sequence blue, white, blue, white, yellow to aid the detectorist in distinguishing one transect from another. Except on long fields, when intermediate lines of canes are needed, the baselines lie within 20m of the field margin. A second row of canes is then placed at the field edge at either end of the field, positioned by aligning with the canes on the two baselines. These end rows, within 20m of each other, are intended to enable detectorist to always accurately maintain their position on the transect when detecting by ensuring the relevant flagged canes are aligned.
Each detectorist makes a single traverse from cane to cane across the field. When reaching the other end of the field they then move on to the next un-worked transect to return. Each member of the team is encouraged to work at a similar pace to minimise the inevitable survey biases. This is intended, as far as practicable, to provide a consistent sample of the artefacts across the whole battlefield.
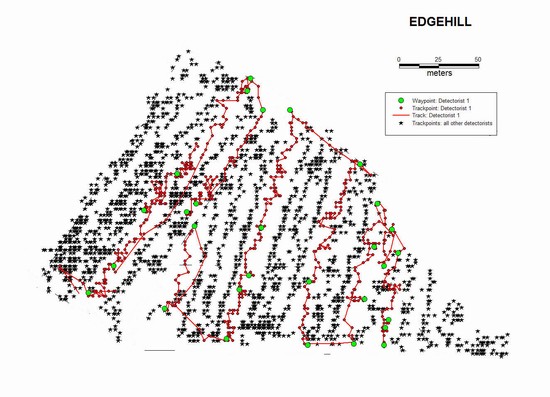
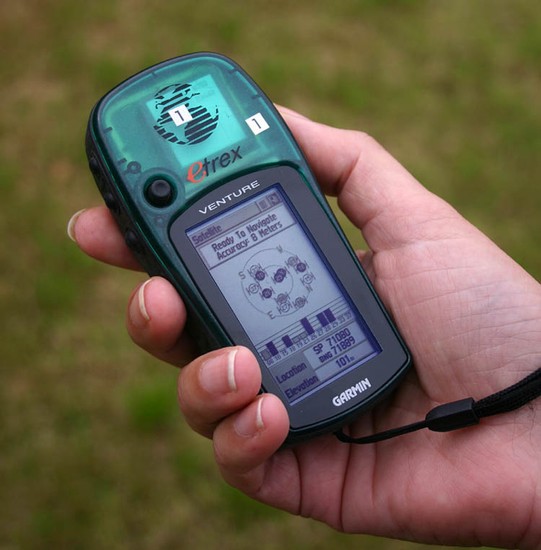
The objective of consistent coverage is further enhanced by the use of Global Positioning System (GPS) units. The chosen GPS unit is the Garmin Etrex Venture. Each detectorist carries a GPS unit set to record their location every 15 seconds during the survey. The units hold over 2000 of these ‘trackpoints’, enabling a whole day’s survey to be logged. At the beginning and end of each transect the detectorist also records a waypoint to confirm the transect length detected. When downloaded into a Geographical Information System (MapInfo GIS) this data enables the actual spatial coverage and timing to be accurately mapped. This provides information on exactly how much time was spent prospecting as opposed to digging, as well as time not detecting. It is intended that this provides an effective method to compare surveys on different battlefields. In addition, at the start of the day a ‘static’ GPS unit is placed at a known point marked on the Ordnance Survey mapping. The track log of this static GPS provides a 15 second interval record showing the drift in GPS location and should be useable to enable reprocessing of the data from each detectorist’s GPS to provide a limited correction for the drift.
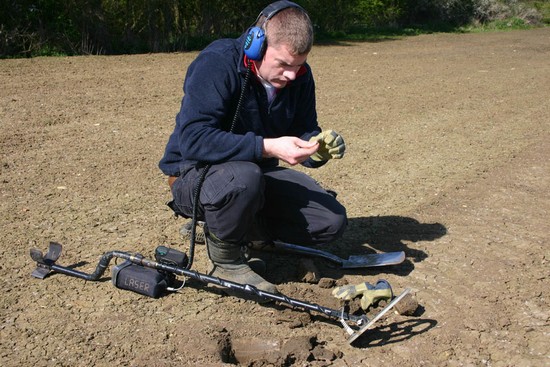
Each find, apart from obviously modern ‘junk’, is separately bagged when found. The GPS is then used to record a ‘waypoint’. The GPS unit stores the latitude/longitude (for conversion to 12 figure grid reference) for each waypoint. The finds bag is then annotated with the detectorist’s initials and the waypoint number so that it can later be correlated with the GPS data downloaded into the GIS. When the work on that field for that day is completed then all the finds bags from that field from that day are placed together in a single large bag and dated. Brief notes are also made as to the land use, soil conditions etc of the field, weather and other information relevant for the understanding of the effectiveness of the detecting on that field on that day. The metal detector used by each detectorist is also recorded. Also a note is made of the number of non ferrous ‘junk’ collected be each person, as a guide to the degree of confusing background material and as a general guide to recovery rates
GPS Set-up
Interface: Garmin
Units: Metric / WSG84
System: WAAS enabled / Normal
Time: 24hr / London zone
Display: 15 second time out/ Contrast low
Tracklog: don’t wrap / record time/ interval 15 seconds
Procedure to start survey
GPS units issued and the number of the GPS unit recorded against detectorist name on the fieldwork record sheet. If any initials duplicate between the detectorists that day then ensure that they write full names on the finds bags not just initials. Insert recharged batteries into GPS. Go to Trip screen – check all fields have been reset to zero. Go to Satellite screen and allow GPS unit to find satellites (ensure not beneath or close to trees or buildings etc). Ensure 10m or better accuracy achieved before starting survey work. GPS unit is attached to the stem of the detector with plastic 'cable ties', which can be snipped off with wire cutters at the end of the day. This ensures that the GPS unit always has a good view of the sky and can accurately record the trackpoints for the survey. To conserve GPS memory, to ensure it has storage space for tracking for the whole day, and to aid battery life, turn off GPS during lunch break etc and turn on again when re-starting.
In field recording procedure for detectorists
Always work with GPS showing satellite screen and, before recording a waypoint for a find, check accuracy on satellite screen readout. If not down to 10m or less then hold out in front of you level and allow a few seconds for it to settle to 10m accuracy. If under trees etc then accuracy may not recover.
To obtain a waypoint number, press and hold ‘thumb stick’ on front of unit. A waymark flag appears with a number in it. Write the number on the finds bag together with your own initials. Press the thumb stick again and release immediately. The satellite screen should return – if it does then the waymark has been stored in the GPS unit. This is the point where there is the potential for incorrect recording because if the waymark has not correctly stored in the computer then the number will be repeated again next time a find is to be logged. If any other screen than the Satellite screen appears it is because the wrong button has been pressed. So use the top right side button to scroll back to the satellite screen and repeat procedure. This may give you the next waymark number if you had actually stored the original number. It does not matter if extra waypoints are stored that do not have accompanying finds as these points can be discarded when the data is correlated on the computer.
Download procedure
Download software selected for the Edgehill survey is GPSUtility which is shareware that can be obtained over the web as a fully operational programme for a small fee. It should be noted that this, and indeed the software in the GPS units themselves, do not implement the Ordnance Survey algorithm developed to give high accuracy conversion of WSG84 to British National Grid. As a result, on any site there will be a consistent error of up to circa 10m due to the limitation of the conversion algorithm. Download each GPS unit in two separate files, one for waypoints and another for tracks, suing the standard filename format: Person / data type / date (dd-mm-yy). For example: DBeaumonttrack2004-08-01. Save each as separate txt files. These are the master files as they contain all the GPS data recorded by the GPS unit. All other data output formats can be created later from the txt file using GPSUtility. Store the files in GPS directory for the survey in sub directory with date of the survey work. Waypoints to also be saved as a mif/mid file with same filename for import into MapInfo. Trackpoints to be saved in Shape file format for import into MapInfo. Backup these files. Only when all data has been saved and backed up should the GPS unit be zeroed.
Integration into GIS
Survey Field table: digitise field polygon for each field surveyed that day and record date surveyed. There may be several polygons for the same field with different survey dates. Import waypoints and trackpoints into MapInfo.
Finds table: Waypoint data to be integrated into the finds table. Complete relevant fields for each item: Find number (= waypoint number); GPS unit number; detectorist name; date of survey; field number, find description; find period; other comments.
Processing Finds
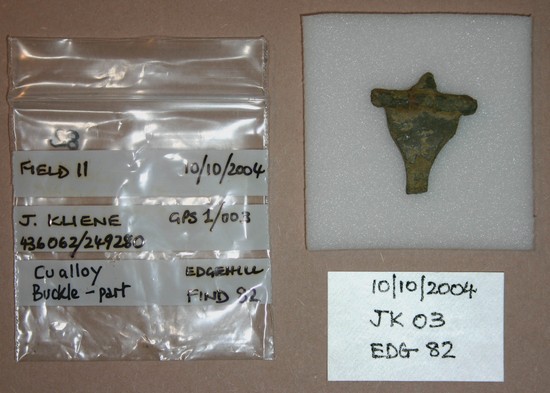
Re-bag every find re-sealable plastic bag (normally 60mm * 60mm but larger as necessary) with white, write on strips. Package find with 50mm * 50mm * 3mm (or larger as appropriate) piece of Plastozote foam as protection from abrasion.
Annotate finds bag on the 3 white bars using fine Staedtler permanent marker (Lumocolor:Art.Nr.313-9).
FIELD NUMBER; DATE (dd/mm/yyyy)
FINDER INITIALS / WAYMARK NUMBER; GRID REFERENCE (12 figure)
FIND TYPE EDGEHILL FIND NUMBER
Eg:
FIELD 1 08/08/2004
CK 09 435358 250150
LEAD BALL EDG 2591
To avoid data loss if data on exterior of bag fades or is damaged by abrasion, complete a Tyvek label using Pigma Micron 005 archival ink pen (0.2mm line width) with essential data:
DATE (of recovery)
FINDER INITIALS / WAYMARK NUMBER
EDGEHILL FIND NUMBER
Place label in bag in front of foam and the find behind the foam.
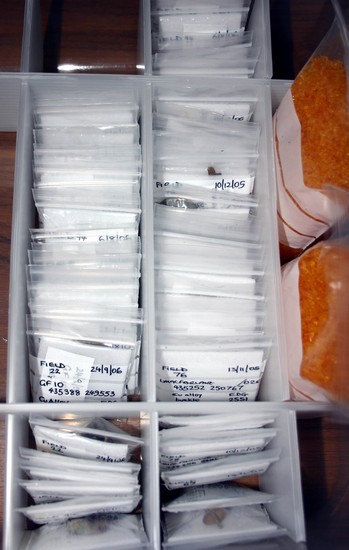
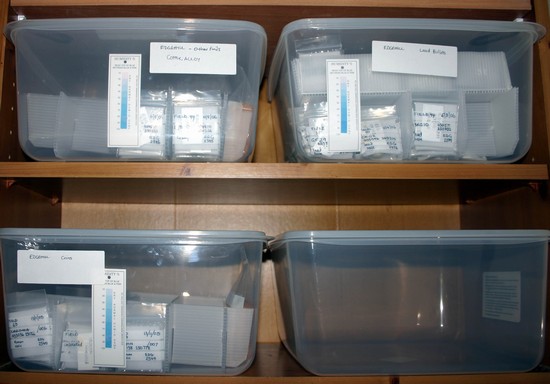
All finds to be stored in 13 litre polypropylene airtight boxes (Stewart boxes, product ID: 1781008), separate boxes for: coins, copper alloy, ferrous, lead, lead bullets. Finds bags are stored standing upright in Find Number order within the appropriate box. To facilitate this the boxes are divided into compartments using 4mm thick corrugated plastic, with a second level of finds in a subdivided tray stapled together from corrugated plastic. To maintain low humidity each box to contain 1kg Orange Indicating silica gel in re-sealable bags perforated with numerous small holes. Inside to the front of each box a Humidity Indicator strip faces outward to enable regular (at least weekly) monitoring of humidity levels.
Photography
Each find to be laid beside its Tyvek label (for find details) and with a mm scale and photographed digitally using ring flash mounted on digital SLR camera on a copy stand. Images at full resolution saved as TIFF file type. File number is Find number plus a suffix a (b, c etc then used to distinguish additional images of other sides of the object, where appropriate). Where more than one image is taken then the images combined in Photoshop to create an additional composite image with the file name of the Find number only.
Suppliers used for archiving materials:
Stewart Boxes: Azpack Ltd.
Pastozote, archival pens, corrugated plastic, tyvek for labels, humidity indicators, silica gel: Preservation Equipment Ltd.